Windows
All things Microsoft Windows
- Upgrade Windows Server 2019 Core to 2022 Core
- Microsoft Windows Documentation on Learn
- Black Screen with Only Mouse Cursor Fix
- Discover Wi-Fi Password for Existing Profile
- Check and Troubleshoot DNS
- GodMode Folder
- Run CMD as Administrator Always
- Picture Vault
- Cipher - Command Prompt Encryption
- Command Prompt - F7 List Previous Commands
- Slide To Shutdown Shortcut
Upgrade Windows Server 2019 Core to 2022 Core
Microsoft Windows Server Core is the non-GUI version of Windows Server. Because it lacks all the desktop experience extras, Windows Server Core offers several advantages over the full desktop experience version. These advantages include:
- Greater Stability
- Simplified Management
- Reduced Maintenance
- Reduces system requirements (disk, memory)
- Reduced attack surface
However, using Windows server core can seem tricky at times. One of those times can be when you have to upgrade it. However, upgrading the Server core is really surprisingly easy.
In this example, I have Windows Server 2019 Core running as a virtual server in Microsoft Hyper-V. In my case, the first step is to add a virtual DVD drive to my server’s settings in Hyper-V. I tend to remove the DVD drive from my virtual machines just to add to the simplification of the configuration.
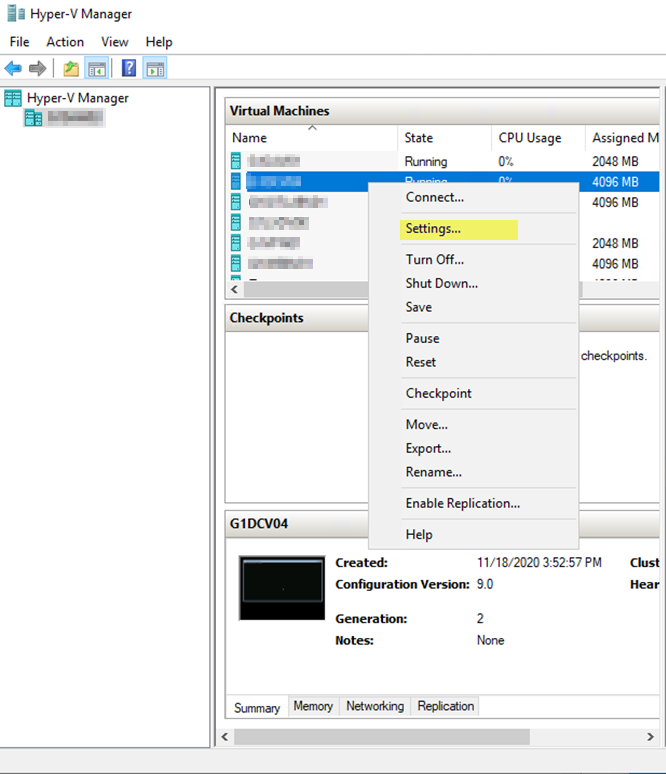
Open Hyper-V Settings for the virtual server to prepare to add a DVD drive.
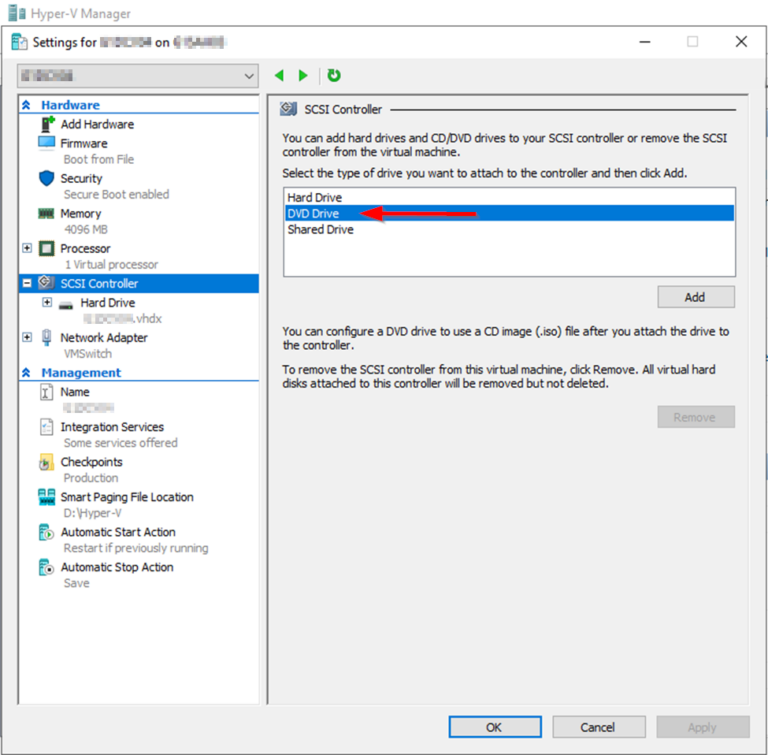
Add the DVD drive under SCSI Controller menu.
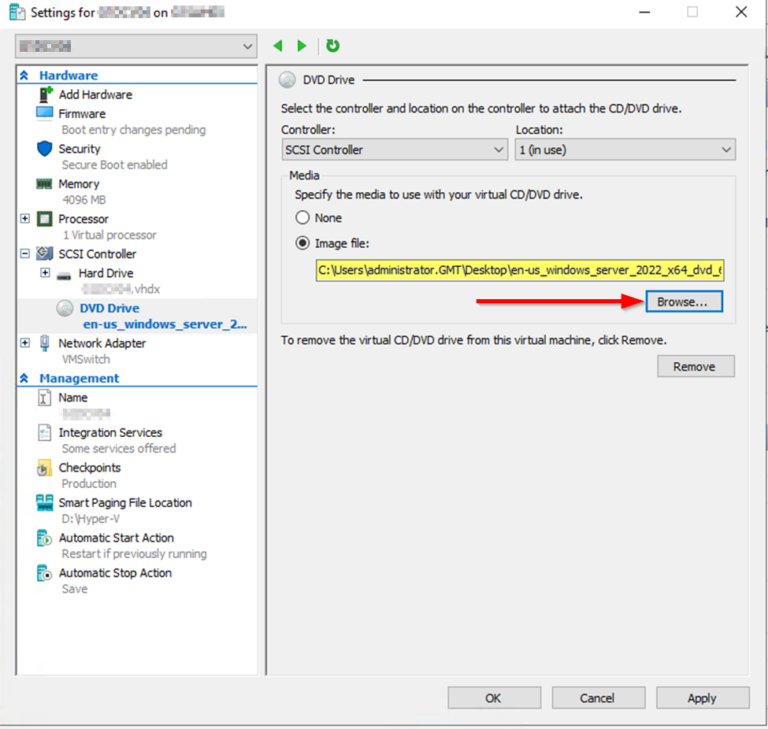
Once the DVD drive has been added the next step is to select the Image file and browse to attach Windows 2022 ISO file.
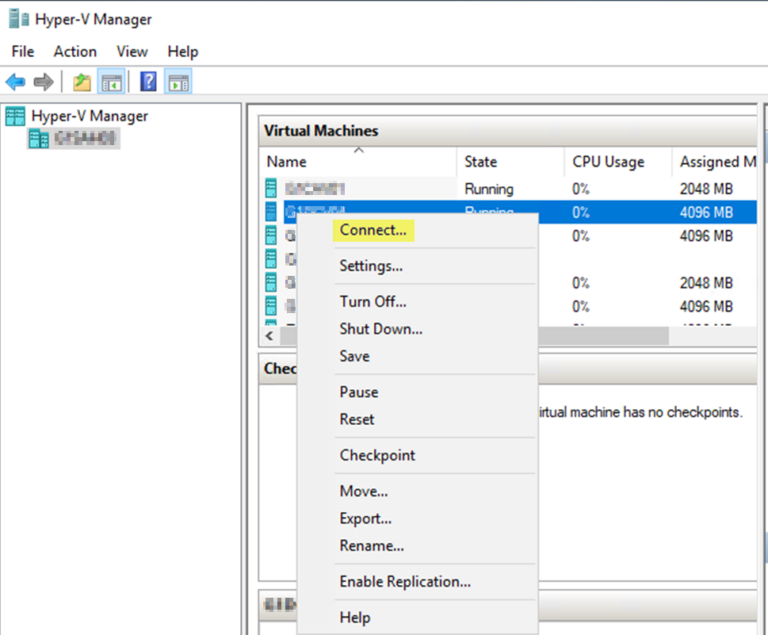
Next, connect to the virtual server.
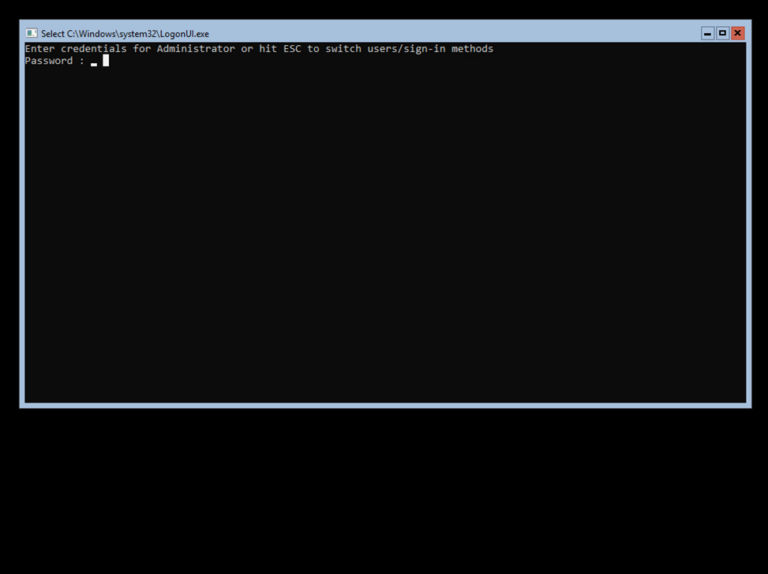
Login to server.
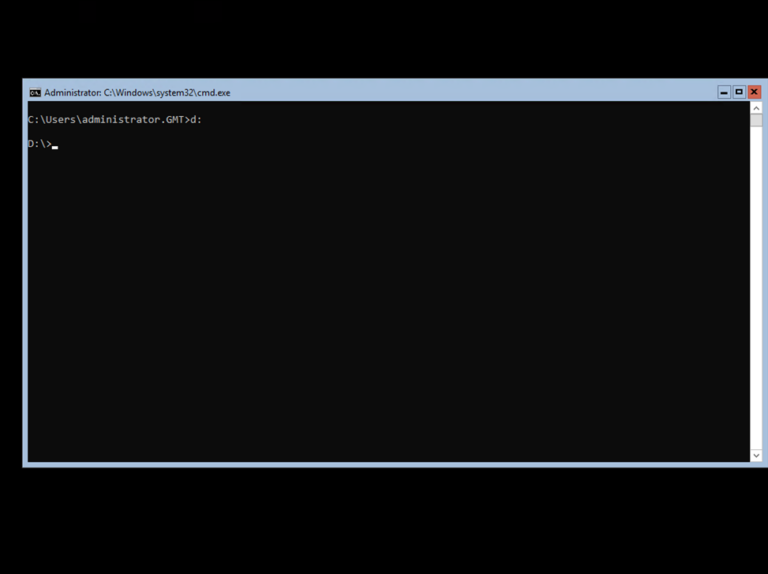
Change to the D: drive in the command window.
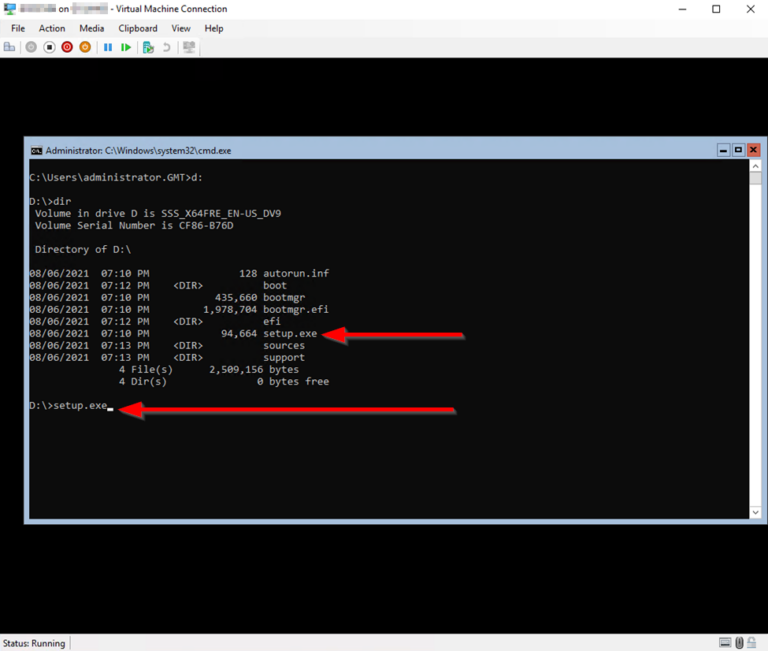
I ran a dir command to check that I was connected to the ISO file. I can see that I am indeed connected because I can see the setup.exe file. Run setup.exe to start to install.
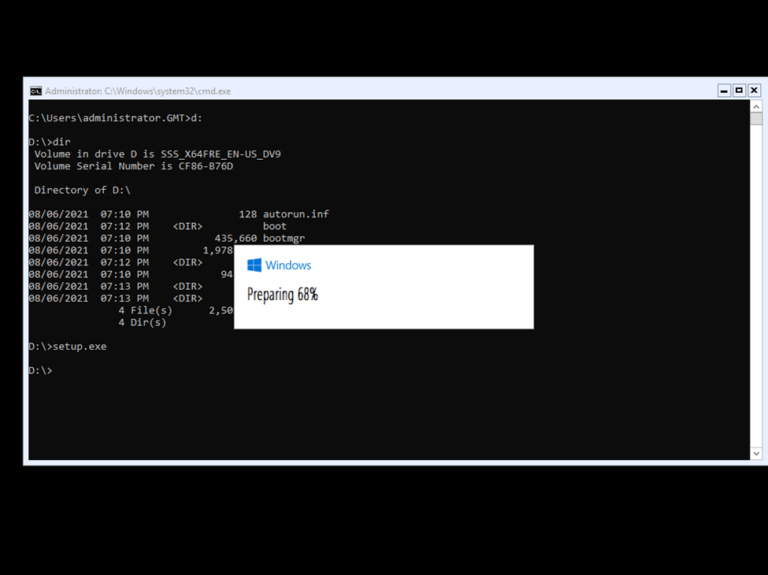
The install of Windows Server 2022 starts.
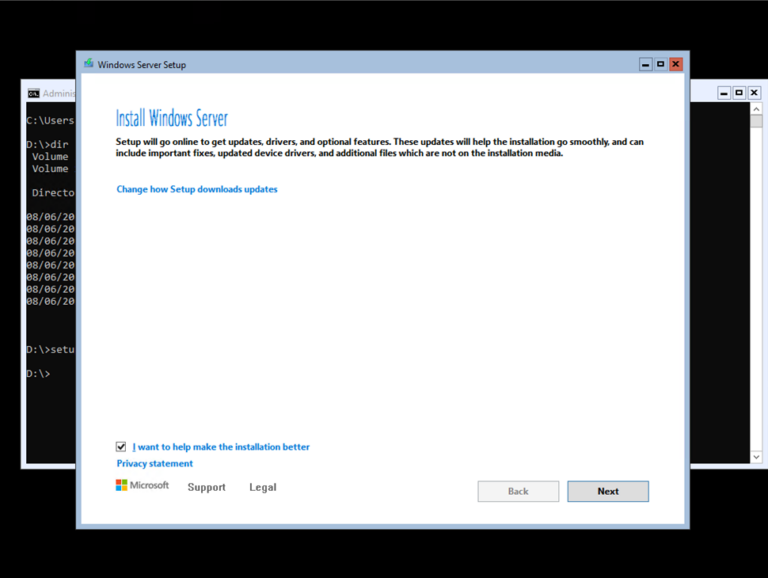
Select whether you want to participate to help make the installation better for Microsoft.
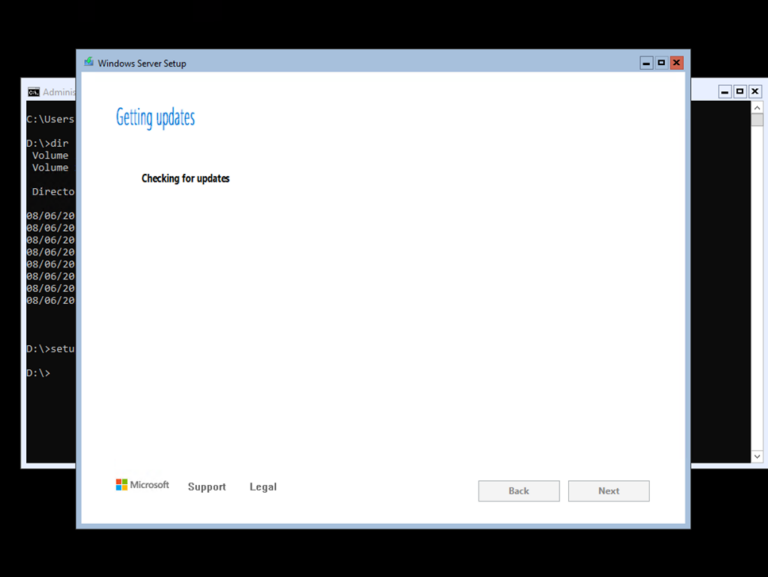
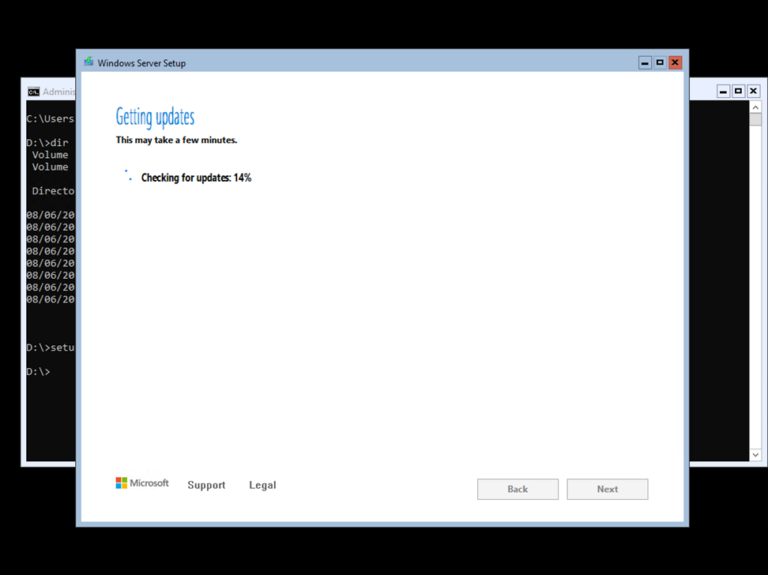
The installer will automatically check for updates.
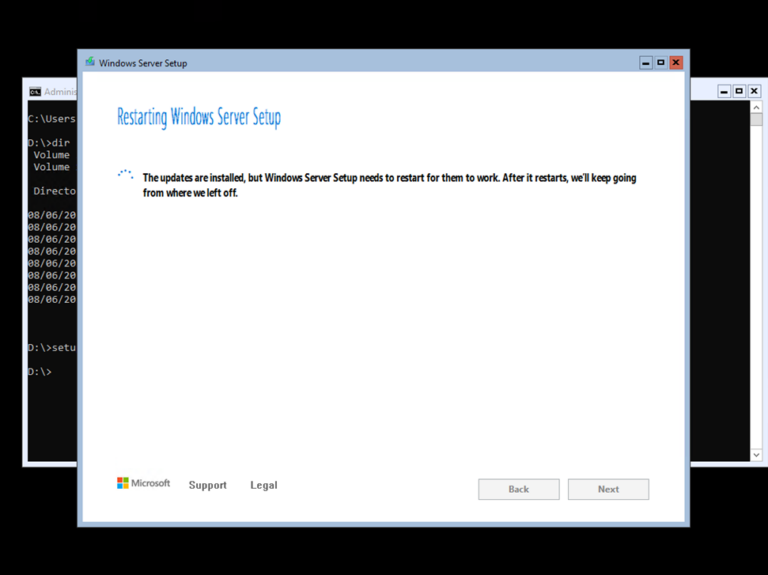
Once the installer installs the updates it will warn that it needs to restart for the updates to work.
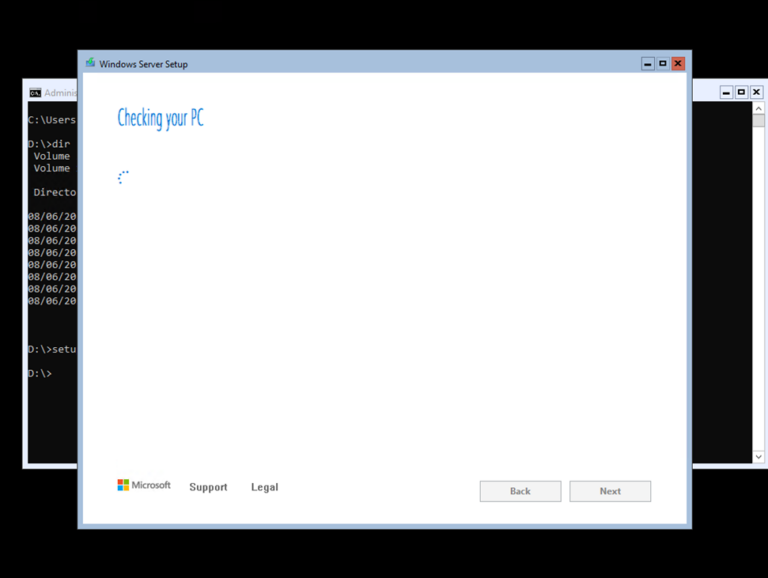
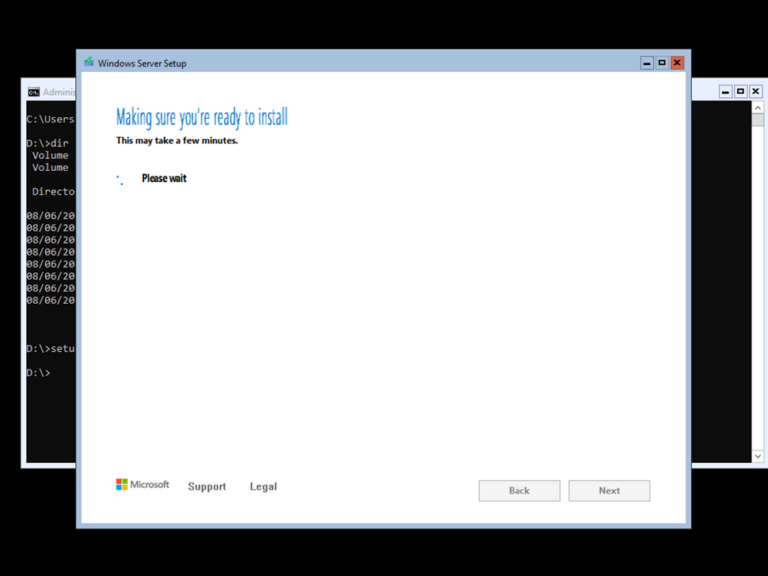
The installer now checks your server to ensure that it can safely install Windows Server 2022.
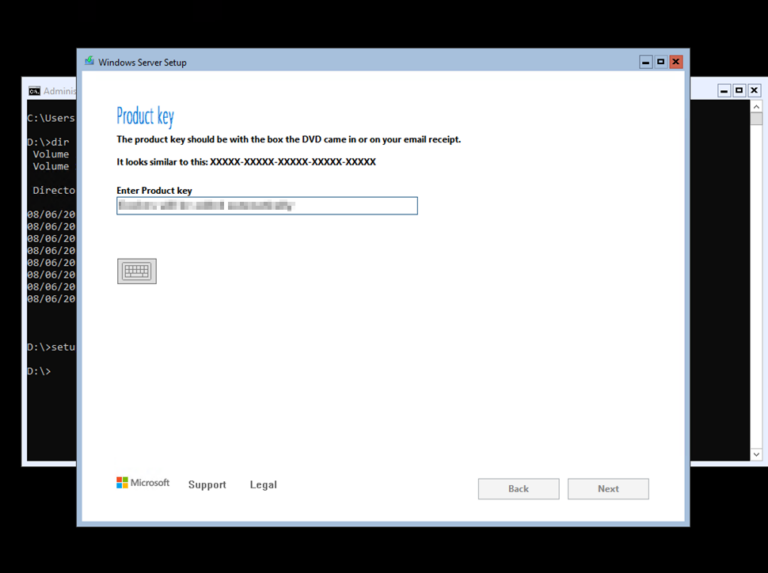
You have to enter a valid product key to proceed.
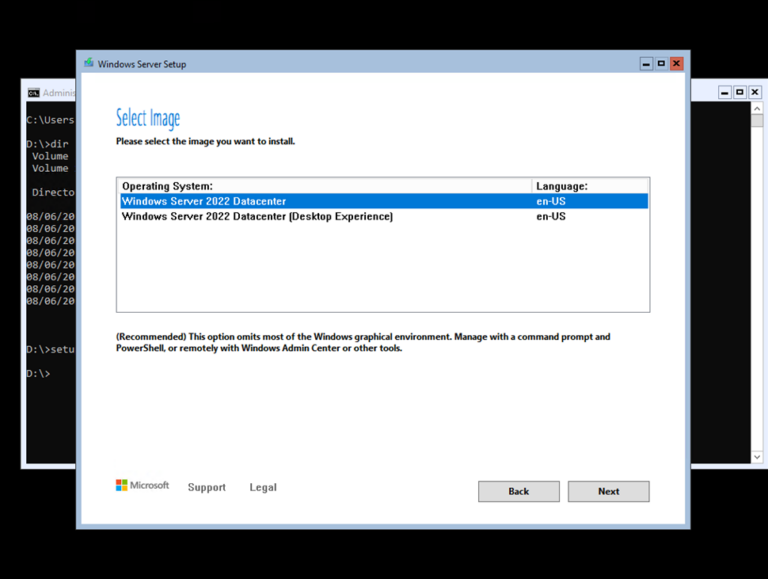
This screen is very important. Since I am upgrading Windows Server 2019 Core I made sure that I selected the first option in the list. This option does not include the ‘desktop experience’ GUI files. So, this will be a core install.
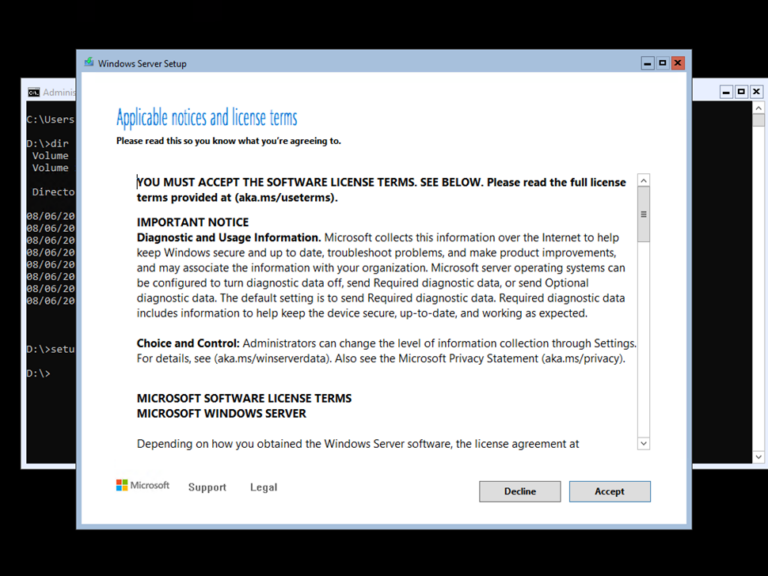
Accept all the Legal stuff.
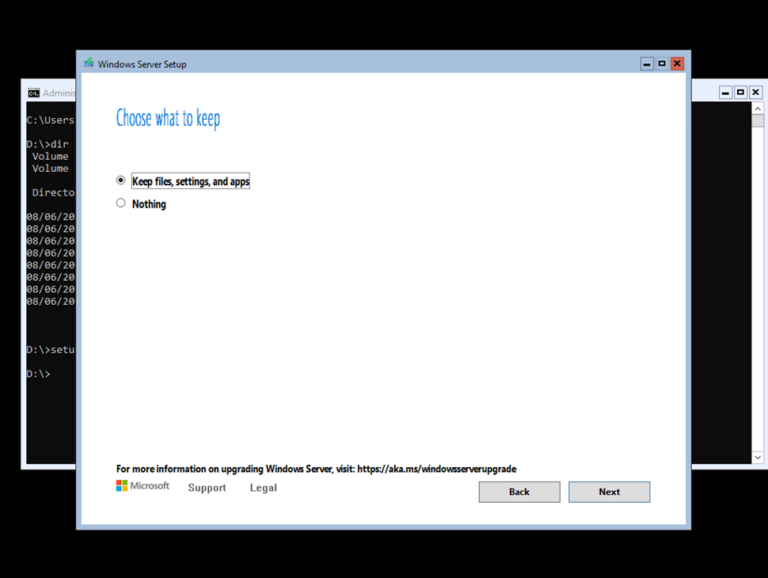
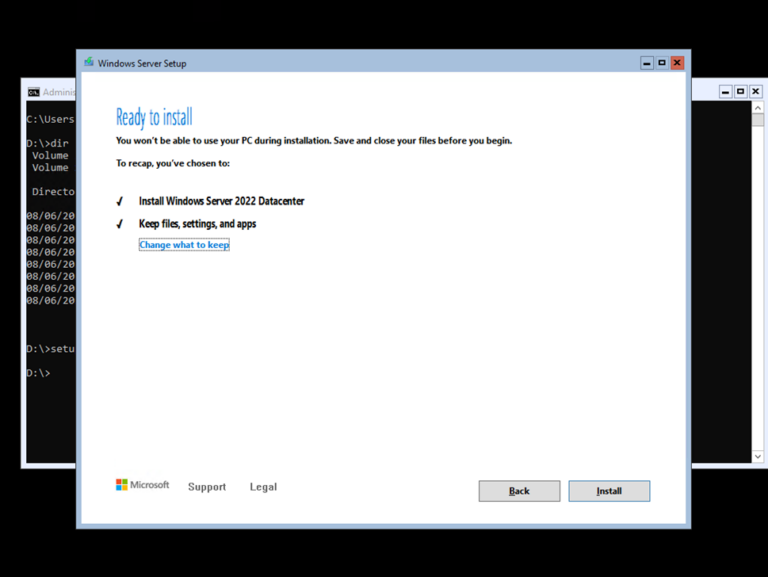
Another very important screen! My install is an upgrade and I definitely want to keep all my files, settings, and apps for this upgrade.
Progress dialogue.
Another progress dialogue.
Once you click Install on this window the installation will start in earnest.
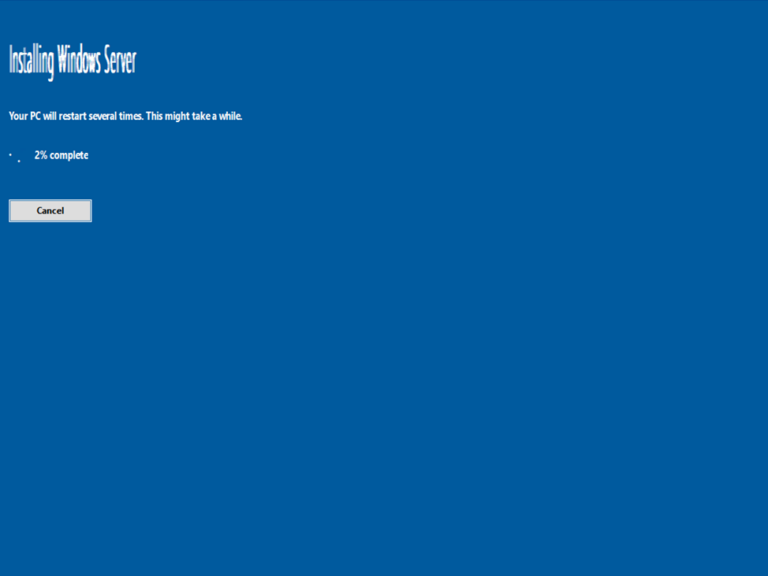
Installation Starts
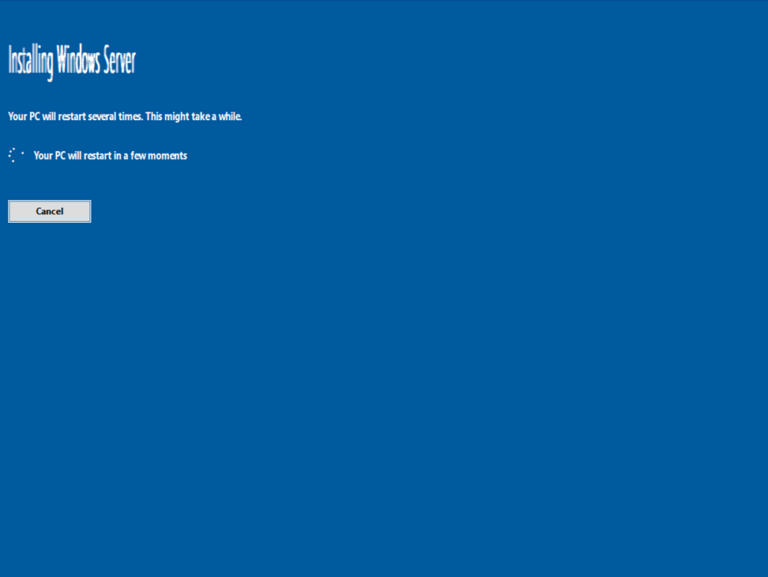
After install, the server will restart and continue to work on updates.

After the installation finishes, I logged into the server. The first thing you will notice, if you are familiar with the previous versions of Server Core, is that the Sconfig dialogue will start automatically upon login to Windows Server 2022 Core. If you would rather that Sconfig not start automatically and want to have the server start with a PowerShell window you can enter the following at a Powershell prompt.
Set-SConfig -AutoLaunch $false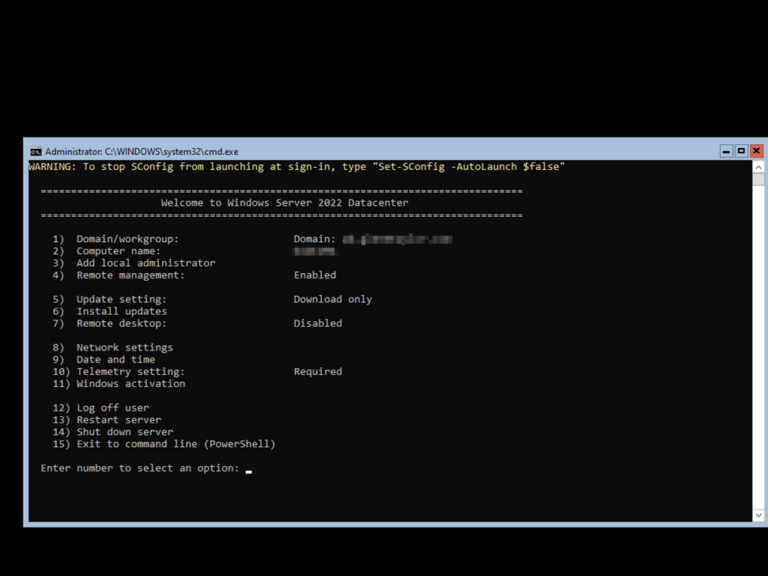
All done! Windows Server Core is now upgraded.
Microsoft Windows Documentation on Learn
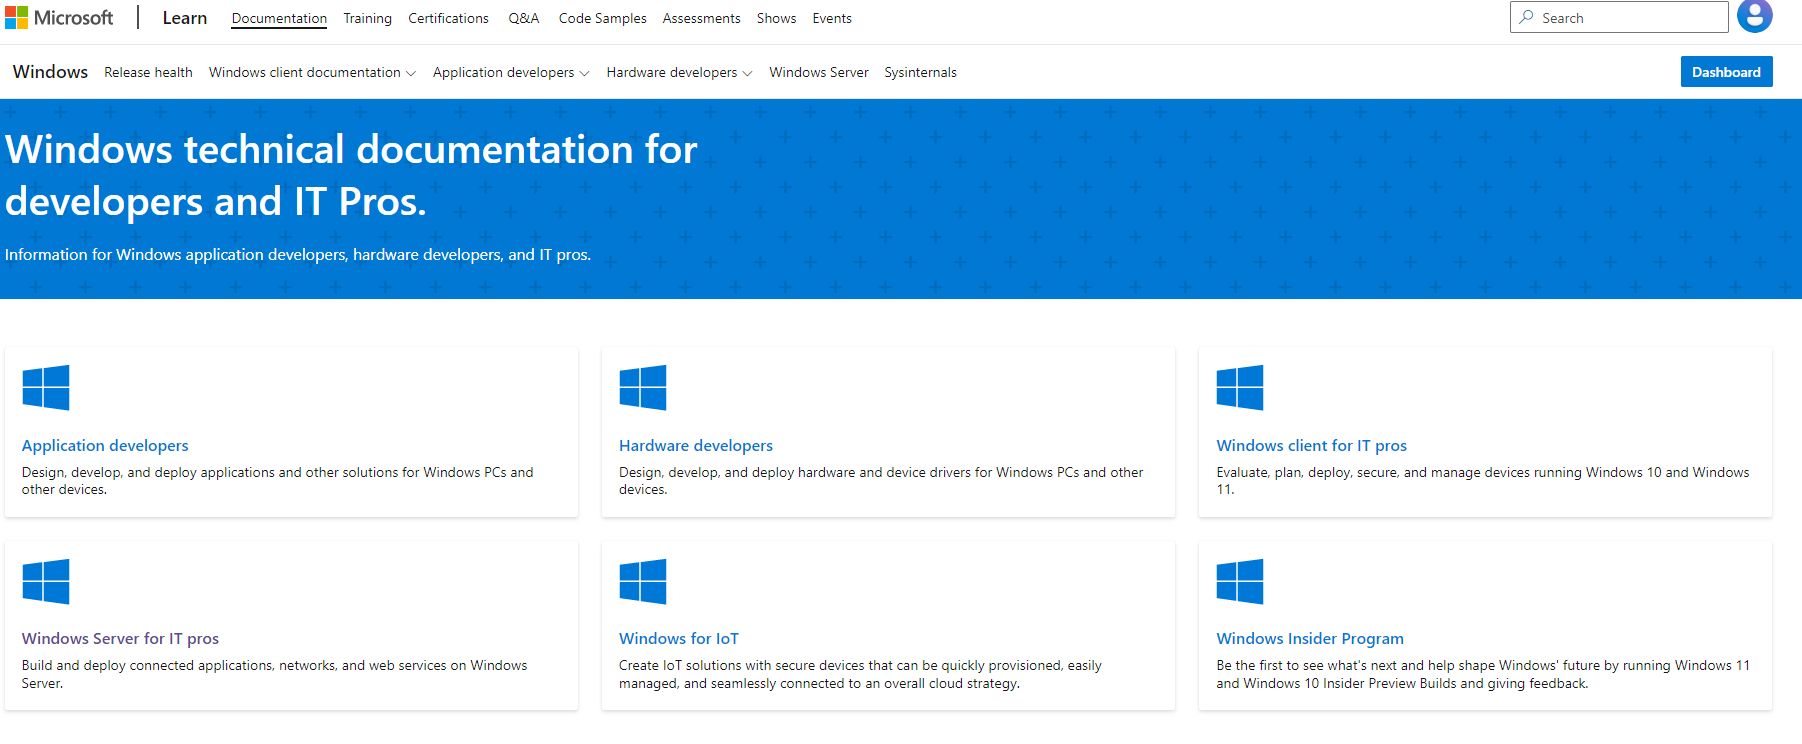
Windows technical documentation for developers and IT Pros.
Black Screen with Only Mouse Cursor Fix
Black Screen with Mouse Cursor

If you ever have the screen on Windows go black and show only the mouse cursor try this trick. Hold down
 +
+  +
+  +
+ 
This will reset your graphics card and should restore your screen.
Discover Wi-Fi Password for Existing Profile
If you have already connected to a Wi-Fi network previously then a profile for that network is created in Windows. To see the existing Wi-Fi profiles open a Command prompt and run as administrator.
Now enter the command netsh wlan show profiles

A list of Wi-Fi profiles will be produced like below.
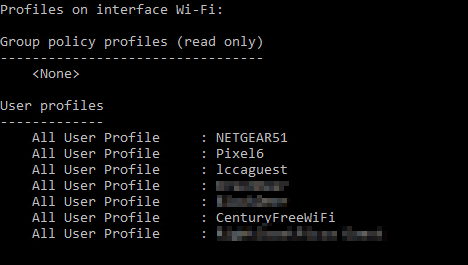
Now pick the profile that you want to get the passcode for and then enter this command to retrieve the passcode.
netsh wlan show profile name="<Name of Wi-Fi Profile>" key=clear

The output will have a field called "Key Content"
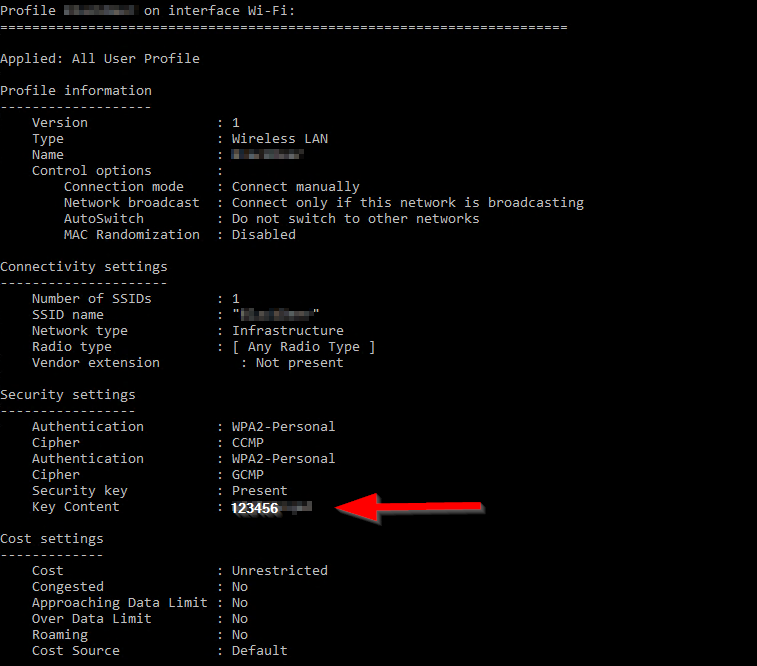
And this is the password for that Wi-Fi profile.
Check and Troubleshoot DNS
Here are a collection of Windows Command Prompt commands for working with an troubleshooting DNS
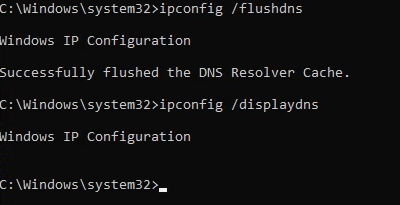
ipconfig /displaydns
ipconfig /displaydns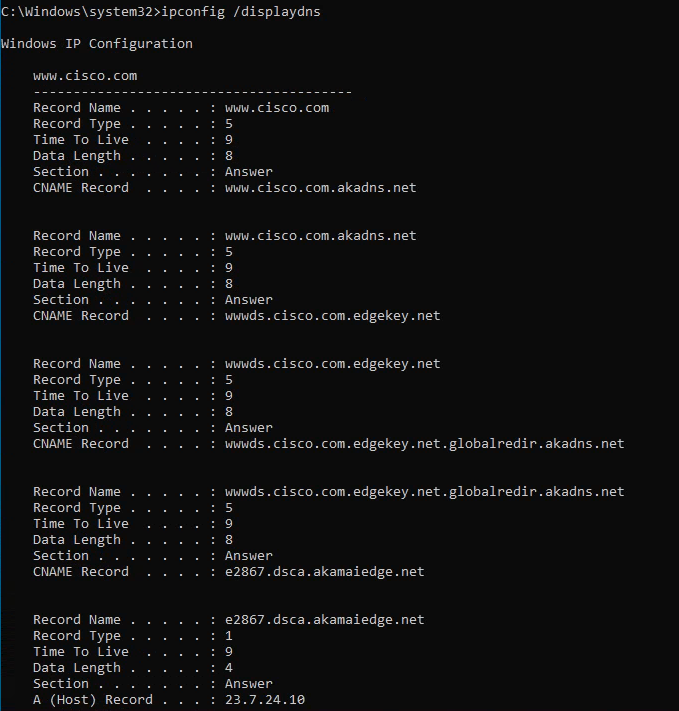
Output of DNS Cache Explained
| Output | Description |
| Record Name | This is the name that was queried for and resolved via a DNS request |
| Record Type |
1 = A record for IPv4 5 = CNAME record 15 = MX record 16 = Text record 28 = AAAA record for IPV6 12 = PTR (pointer) record These are just a few of the DNS resource types with their associated numbers. For more check this Wikipedia article. |
| Time to Live | The time in seconds after which the cached DNS entry will expire. |
| Data Length | The data length refers to the size of the data stored in the cache for a particular domain name. This data can include information such as the IP address associated with the domain name, the time to live (TTL) for the record, and other details about the DNS query. The data length is typically measured in bytes, and is used by the DNS resolver to determine how much space to allocate for the record in its cache. |
| Section | This is a header designating the 'Answer', which is what follows as the A (Host) Record |
| A (Host) Record | This is the corresponding resolved IPv4 address for the domain name. |
Adding the pipe with clip to the command copies the output to the clipboard and you can copy that into a text editor to make it easier to search and filter the results.
ipconfig /displaydns | clip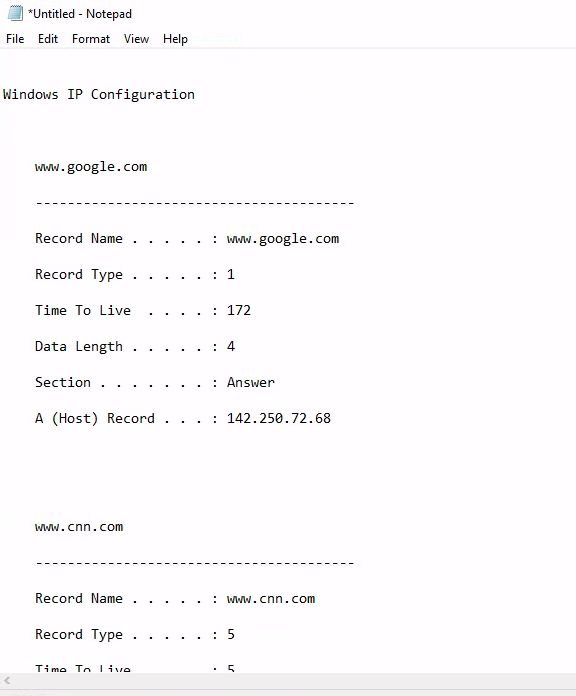
ipconfig /flushdns
ipconfig /flushdnsThis command clears the DNS cache
nslookup <domain name>
nslookup <domain name>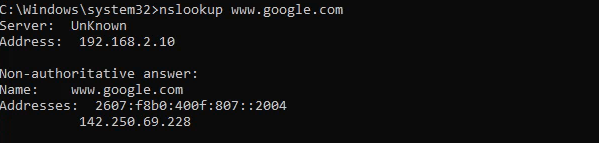
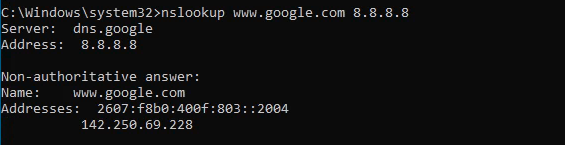
You can add the DNS server you want to query to the end of the command.
nslookup <domain name> <dns server IP>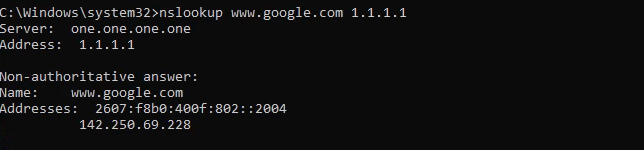
If there are specific DNS records like mail, text, or pointer records you can add type to the query.
nslookup -type=mx <domain name>
nslookup -type=txt <domain name>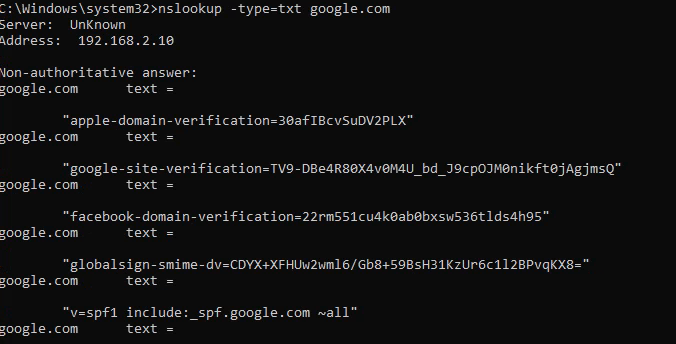
nslookup -type=ptr <domain name>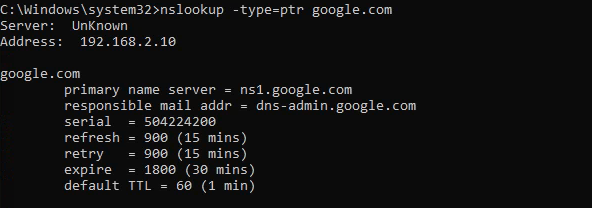
GodMode Folder
Follow these steps to create a folder that will give you access to all the settings in Windows.
-
On the Windows desktop right-click and select New > Folder

-
Next, Right-click the folder and select Rename

-
Rename the folder to:
GodMode.{ED7BA470-8E54-465E-825C-99712043E01C}
-
After renaming the folder the icon will change and look like the same icon used for the Control Panel.

-
When you open the renamed folder, you will see all the Window's settings inside.


Run CMD as Administrator Always
Here is how to make the Command Prompt (CMD) in Windows run as Administrator all the time.
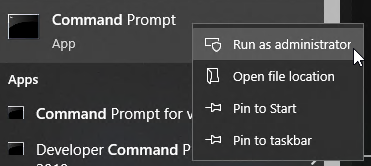
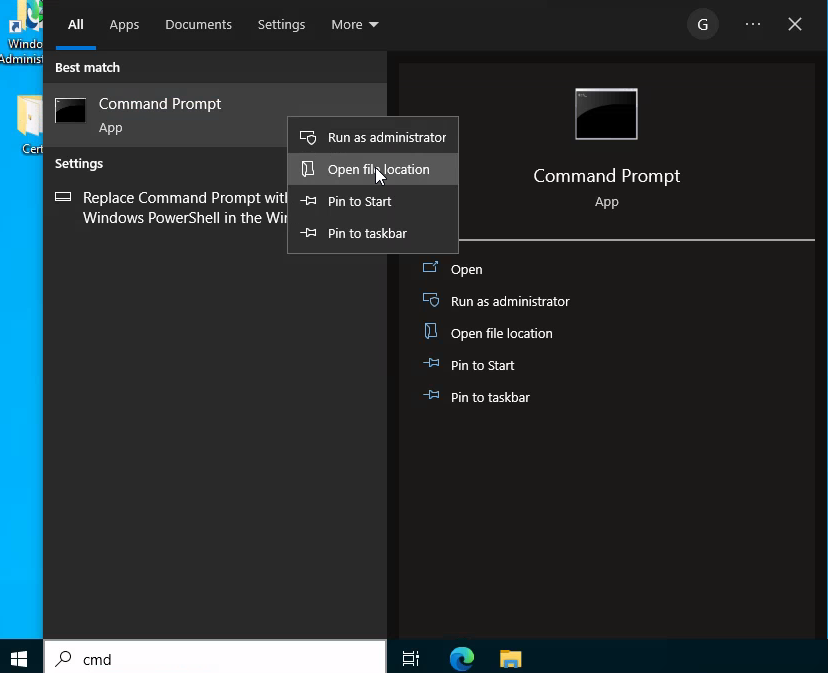
1. First, click on the start menu and type 'cmd'. When the Command Prompt shows up in the search right-click on it and select 'Open file location'.
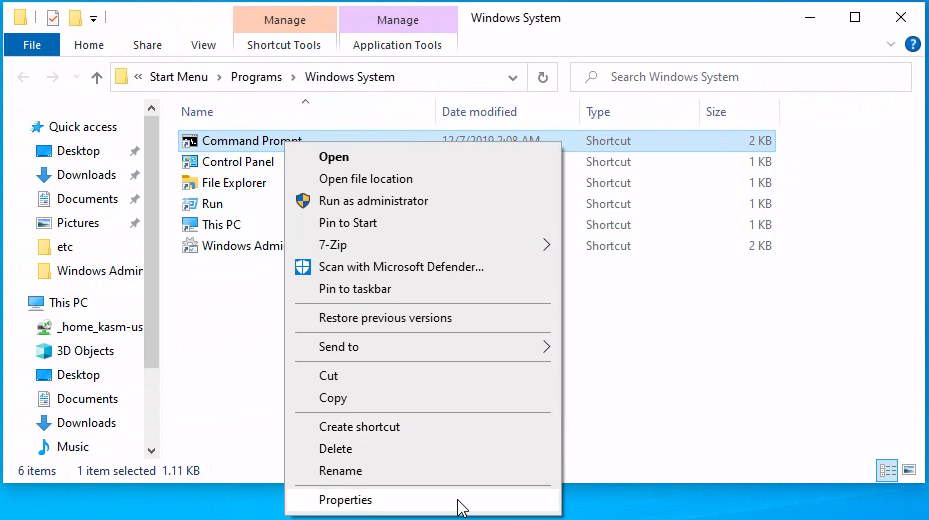
2. When the folder opens with the Command Prompt shortcut icon, right-click the icon and select 'Properties'
3. When the Command Prompt Properties dialogue opens click on the 'Advanced' button at the bottom of the dialogue.
4. Click the box for 'Run as administrator' to select this option. Then click OK to close this dialogue. Then click OK again to close the Command Prompt Properties dialogue to apply the setting.
Now, when you open the Command Prompt it will run as administrator every time.
Picture Vault
Here is a way to hide your secret stuff in an image file.
1. First, select all the files you want to hide and create a compressed zip archive with those files by right-clicking after selecting them and choose 'Send to' and then 'Compressed (zipped) folder. Give the new archive a name of your choosing. I will go with the super secure Secrets.zip name.
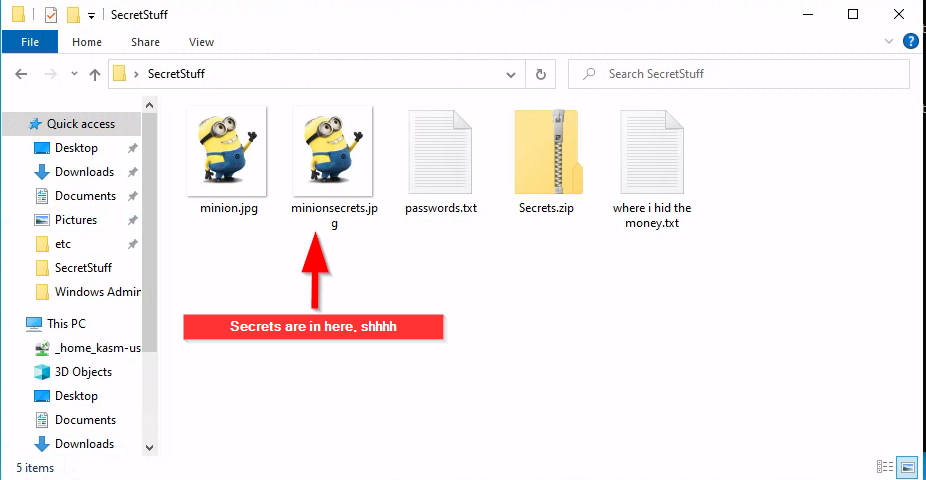
2. Next we need an image. I downloaded this JPEG image of a minion to use.
3. Now I use the this copy command to hide my zip file to look like an ordinary image.
copy /b minion.jpg+Secrets.zip minionsecrets.jpg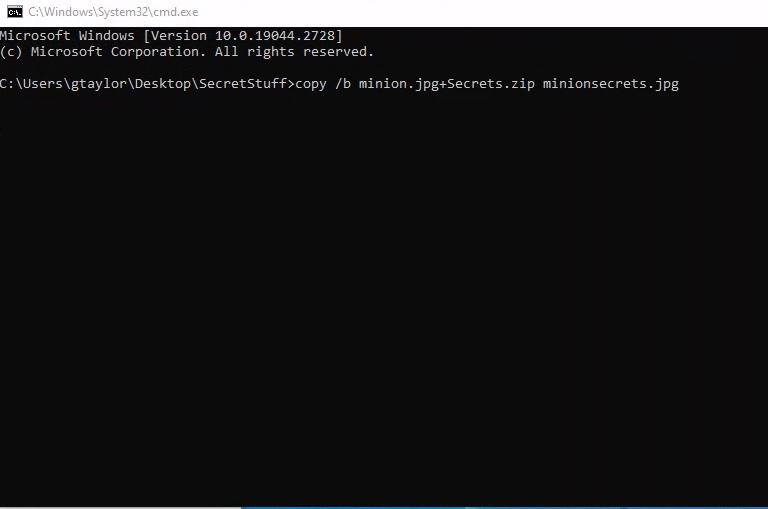
You will get a confirmation that the file was created.
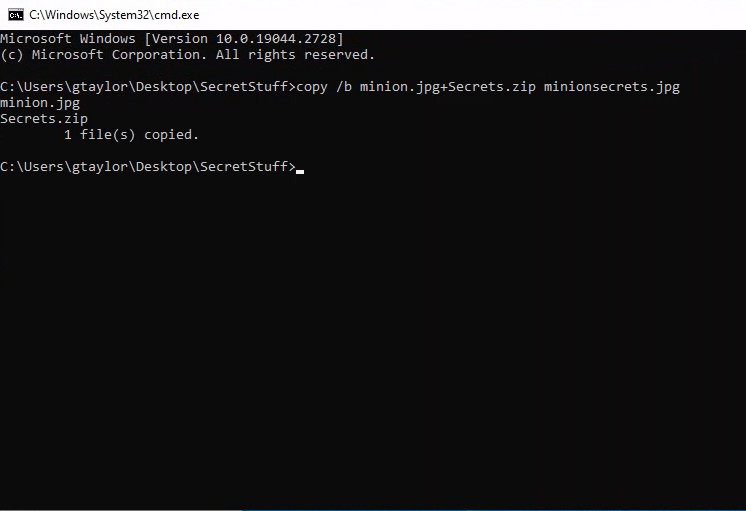
Now, go back to your folder and you will see another 'image file' that looks like and ordinary JPEG image and it even opens as an image.
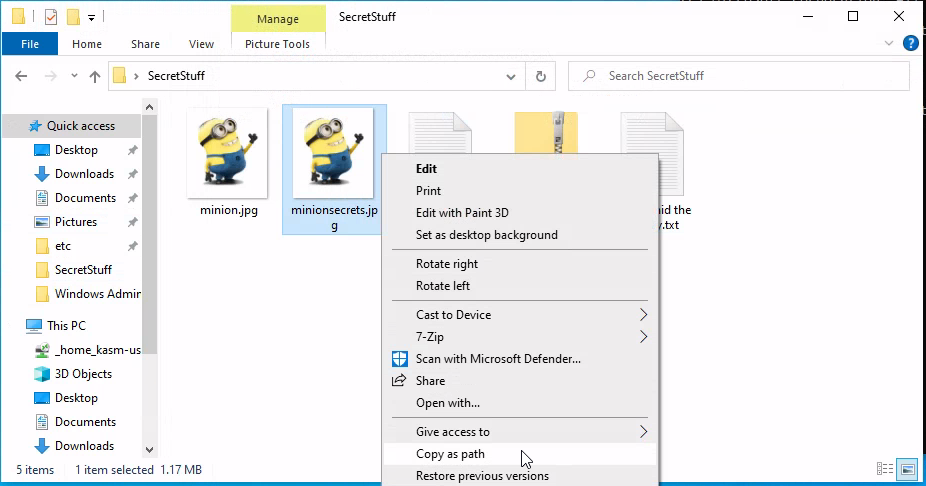
4. How do I open it up to see the hidden files? In order to open this file you will need a program like 7-Zip installed. This is because Windows Explorer just sees the file as an image. First copy the path of the secret image by holding down the Shift key and right-clicking it. Then select 'Copy as path'.
Then open your 7-Zip program and paste the path you just copied for the file into the location bar of 7-Zip and hit enter.
And there you go, your files are shown and can be extracted.
Cipher - Command Prompt Encryption
The cipher command can be used to encrypt files in Windows from the Command Prompt.
The following parameters can be used with the cipher command:
Parameters |
Description |
| /b | Aborts if an error is encountered. By default, cipher continues to run even if errors are encountered. |
| /c | Displays information on the encrypted file. |
| /d | Decrypts the specified files or directories. |
| /e | Encrypts the specified files or directories. Directories are marked so that files that are added afterward will be encrypted. |
| /h | Displays files with hidden or system attributes. By default, these files are not encrypted or decrypted. |
| /k | Creates a new certificate and key for use with Encrypting File System (EFS) files. If the /k parameter is specified, all other parameters are ignored. |
|
/r:<filename> [/smartcard] |
Generates an EFS recovery agent key and certificate, then writes them to a .pfx file (containing certificate and private key) and a .cer file (containing only the certificate). If /smartcard is specified, it writes the recovery key and certificate to a smart card, and no .pfx file is generated. |
| /s:<directory> | Performs the specified operation on all subdirectories in the specified directory. |
| /u [/n] | Finds all encrypted files on the local drive(s). If used with the /n parameter, no updates are made. If used without /n, /u compares the user's file encryption key or the recovery agent's key to the current ones, and updates them if they have changed. This parameter works only with /n. |
| /w:<directory> | Removes data from available unused disk space on the entire volume. If you use the /w parameter, all other parameters are ignored. The directory specified can be located anywhere in a local volume. If it is a mount point or points to a directory in another volume, the data on that volume is removed. |
|
/x[:efsfile] [<FileName>] |
Backs up the EFS certificate and keys to the specified file name. If used with :efsfile, /x backs up the user's certificate(s) that were used to encrypt the file. Otherwise, the user's current EFS certificate and keys are backed up. |
| /y | Displays your current EFS certificate thumbnail on the local computer. |
|
/adduser [/certhash:<hash>] |
/certfile:<filename>] |
| /rekey | Updates the specified encrypted file(s) to use the currently configured EFS key. |
|
/removeuser /certhash:<hash> |
Removes a user from the specified file(s). The Hash provided for /certhash must be the SHA1 hash of the certificate to remove. |
| /? | Displays help at the command prompt. |
**Source
Example of Encrypting and Decrypting a Folder in Windows 10
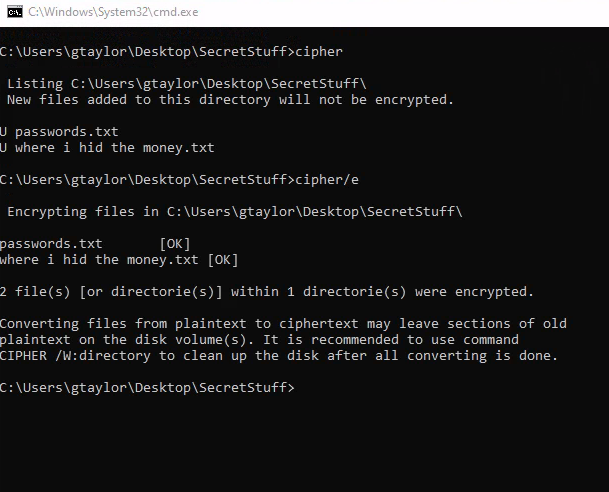
Below is an example folder (SecretStuff) that has two files in it. If I want to encrypt the folder and the two files in it I can use the cipher command from an administrator privilege command prompt to see the status of encryptioncls
.
The 'U' next to the two files indicates that the files are not encrypted.
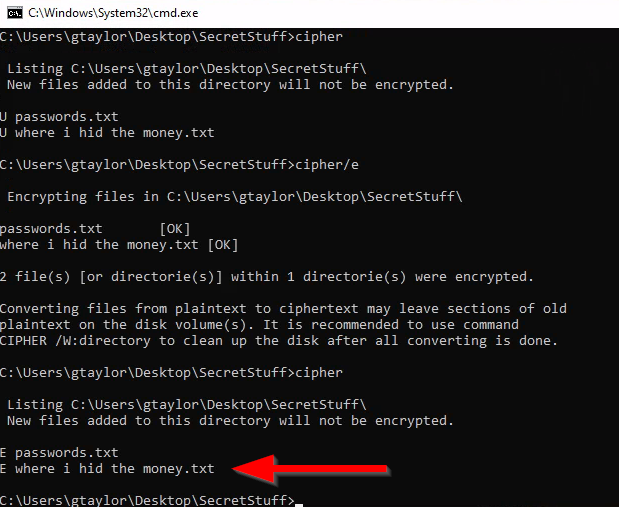
To encrypt the files use the cipher /e parameter to encrypt everything in the SecretStuff folder and the folder itself.
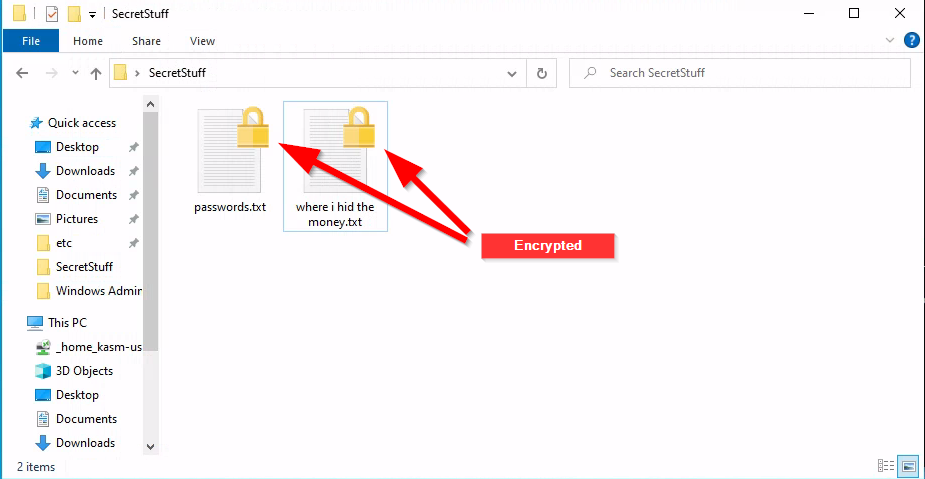
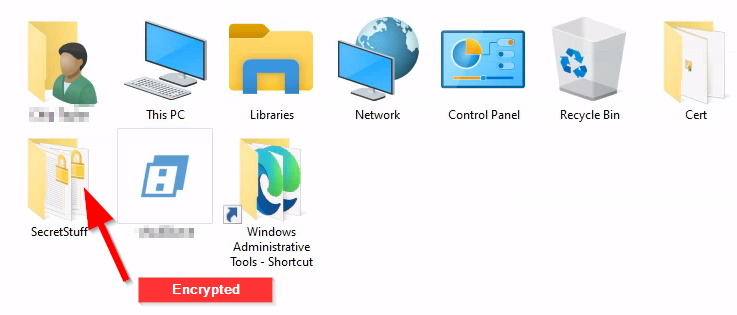
Now, if we check again using the cipher command without any parameters we see that the files are encrypted. The 'E' denotes that the files are now encrypted. There is also a visual queue in Windows Explorer that shows that the files are encrypted. A padlock icon is added to the icons for both files.
Last, if you want to decrypt everything the SecretStuff folder and the folder itself just use the command cipher /d
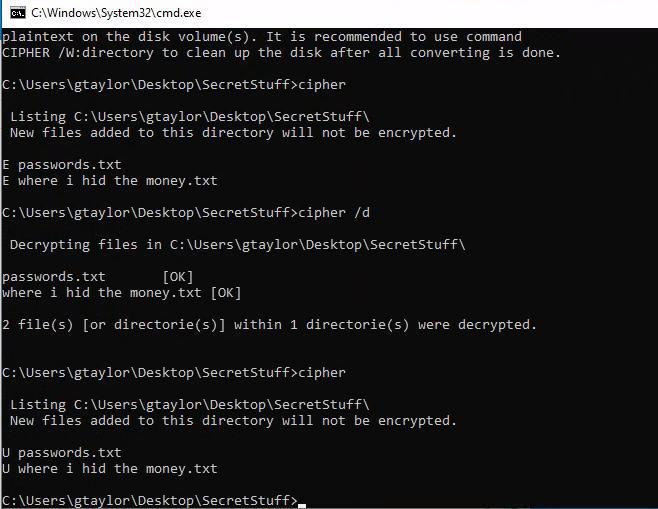
And the files and folder are now decrypted again.
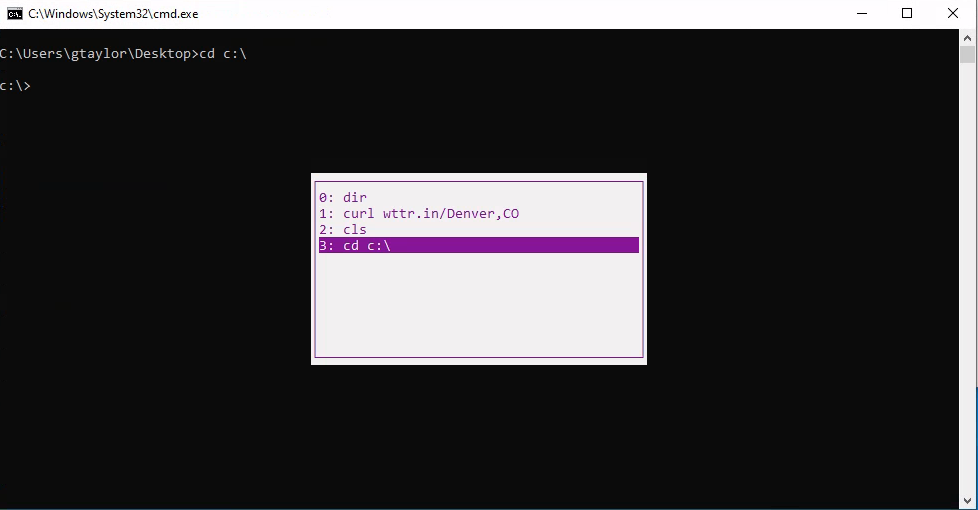
Command Prompt - F7 List Previous Commands
If you want to see a list of all the previous commands from your current Command Prompt session just push the F7 key to see a list of commands like below.
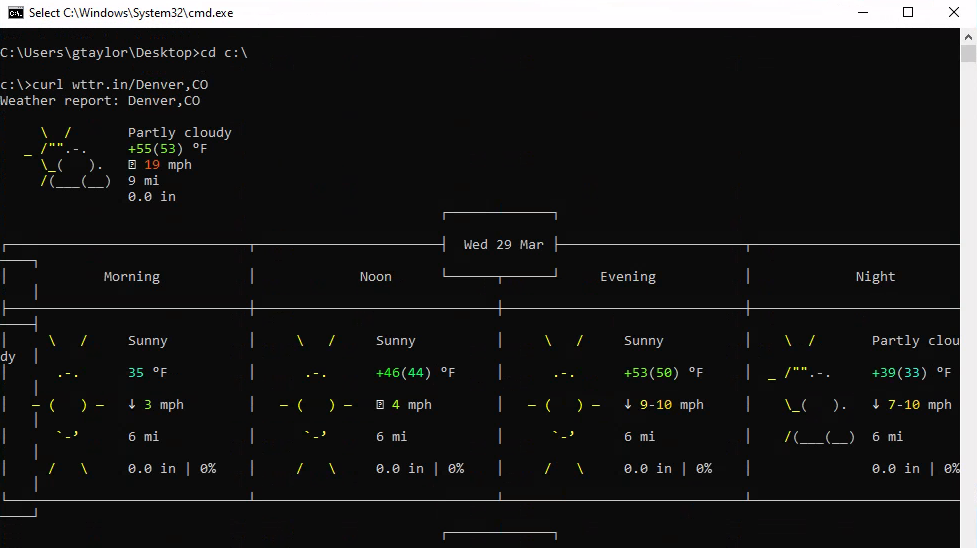
Now you can use the up and down arrows to select a command from the list then hit enter to re-run it.

And just like that the curl command runs again
Bonus: You can also use the F5 key to cycle through the previous commands.
Slide To Shutdown Shortcut
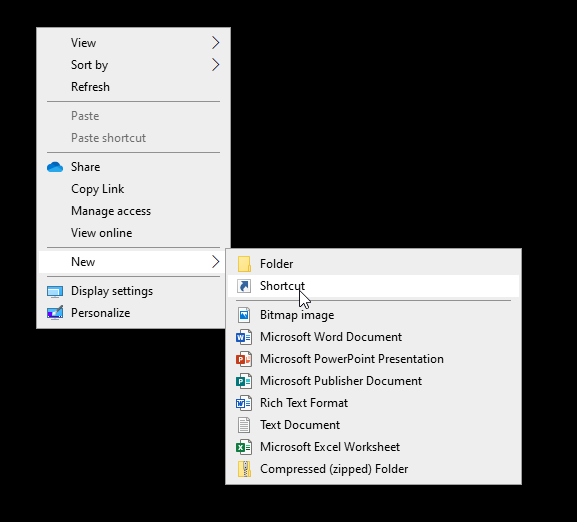
1. Right click the desktop and select New > Shortcut
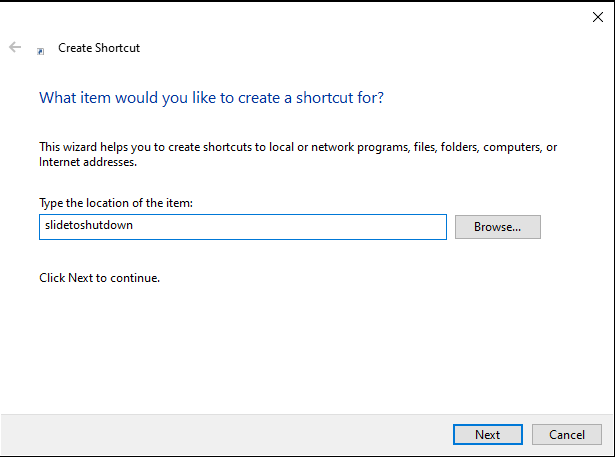
2. The create shortcut dialogue will open and in the Type location of the item field enter "slidetoshutdown" as shown in the screenshot below. Then click the Next button.
3. In the next window the create shortcut dialogue will ask what the name for the shortcut should be. Enter the name you would like it to be. Then click Finish.

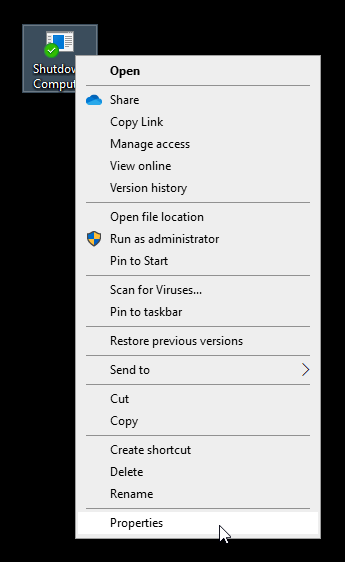
4. The shortcut will not be on your desktop but let's give a better icon. So, right click the shortcut and select Properties.
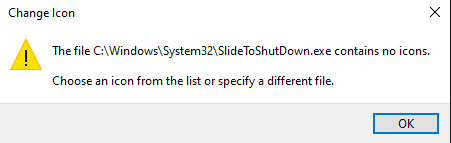
5. Now select the Change Icon ... button. You may get a popup dialogue like this. If so just click OK
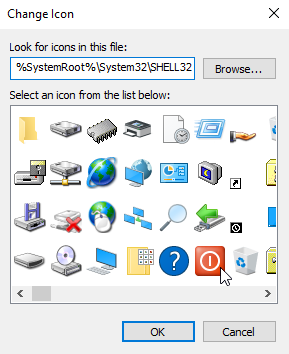
6. The Change Icon dialogue will now appear. Select an icon for your shortcut. I am selecting the icon that looks like a power off button. Once you select the icon click OK and then click OK again to close the Properties dialogue.
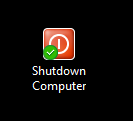
7. You should now see your shortcut with the new icon like mine is below.
8. Now if you double click this shortcut it will initiate the slide to shut down your computer process. An image like the one below with the prompt "Slide to shut down your PC" will appear from the top edge of the screen and stop about halfway down the monitor. Just slide the image the rest of the way down and your computer will shut down. That's it.